Do you want to start a yoga practice at home? Do you wonder where to start, or how to make the time or commitment? The simple answer is Sun Salutations.
Sun Salutations (surya namaskar) are a series of yoga postures strung together so that they flow from one pose to another. They are called sun salutations because, in India, they are traditionally done first thing in the morning as the sun rises to prepare the body for the practice of yoga.
Don’t worry if it takes a little time to perfect sun salutations; it takes practice to flow from one posture to the next. Begin by practicing each individual posture in the sequence before trying them together. In the beginning you may only manage one or two rounds, but with practice you should be able to build up to 10 rounds.
Sun salutations work the entire body and are an excellent warm up. They build strength and stamina as well as improve flexibility.
(Visit the Yoga Ocean You Tube channel for more videos)
1. mountain pose
tadasana
- Stand with the feet about hip width apart and toes pointing straight ahead.
- Lengthen your spine, tuck your tailbone under and roll your shoulders back.
- Keep the tummy held in gently by engaging the muscles just below the navel.
- Lift the kneecaps by tightening the muscles at the top of the thighs.
- Inhale and raise your arms overhead and bring your hands into the prayer position overhead.
2. standing forward bend
uttanasana
- Exhale as you bend from the hips, keeping your back straight.
- Bring your hands to the floor either side of your feet. If need be, bend your knees so that your can being your hands to the floor. Avoid rounding your back – bend the knees instead.
- Hold for as long as comfortable, breathing deeply through the nostrils.
3. lunge
- From a standing forward bend place your hands either side of your feet.
- Step your right foot back as far as it will go.Bring your right knee to the floor.
- Keep your left foot flat on the floor; if the heel is raised then move the foot forward slightly.
- Check that your fingers are well spread to take the extra weight and that the middle fingers point straight ahead – this way your hands and arms are in the correct position for the following postures.
4. plank
- From the lunge pose step your left foot back next to your right foot so that only your hands and toes are touching the floor.
- Keep your tummy muscles working to avoid your back sagging down in the middle – keep your back straight.
- Gaze ahead, your fingers spread wide and the middle fingers pointing forwards. It may help to curl your fingers slightly to take the weight off your wrists.
- Hold
5. ashtanga pose or hare pose
‘Ashta’ is the Sanskrit word for eight. In this pose there are eight parts of the body touching the floor: the two feet, two knees, two hands, chest and chin. If this is too challenging then a gentler variation is to move into hare posture (see video above).
- From the plank pose bring your knees to the floor.
- Bend your elbows in towards the sides of your chest – don’t let your elbows drop to the floor but keep them raised.
- Lower your chest to the floor – this takes strength in the upper arms and flexibility in the back and as such could require a bit of practice to perfect.
- Lower your chin to the floor and gaze straight ahead.
6. striking cobra
bhujangasana
- From the ashtanga pose bring your hips to the floor and push your body forward
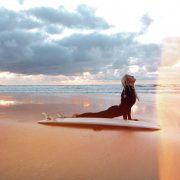
- Inhale as you lift your head and torso into a back bend.
- Push up and straighten your arms as far as is comfortable. Relax your legs.
- For a deeper stretch, bring your feet closer together.
- Gaze upwards and relax your shoulders
In the beginning it will be hard to keep your head low as you come forward but with practice your back will become more flexible and it will be easier.
7. downward dog pose
adho mukha svanasana
- From the cobra pose push your hips up in the air and come up onto your toes.
- Bring your arms and back into a straight line, you may need to keep your knees bent a little if you find that your lower back is rounding.
- Tuck in your tummy and gaze towards your navel. Your body should resemble and upside down ‘V’.
- With each inhalation tilt your hips high and work the top of your head towards the floor, with each exhalation lower your heels closer to the floor. With practice you may be able to put your feet flat on the floor but this is not essential.
8. lunge
- To move from the Dog Head Down pose to lunge place both knees of the floor (With practice your will be able to just step the foot forward between the hands).
- Step your left foot forward between your hands and push your hips towards the floor.
- Gaze upwards and hold.
- Now step your right foot forward as well to return to a standing forward bend position.
9. standing forward bend to mountain pose
- To return to standing make sure that your tummy muscles are engaged to support your back.
- Inhale as you raise your arms and torso – keep your spine straight.
- Return to an upright position and raise your arms overhead in the prayer pose.
- Bring your hands together in the prayer pose in front of your body to end the practice.
Cautions
Sun Salutations are quite vigorous and are not recommended if you have any serious aliments, such as: high blood pressure, slipped disc, detached retina, glaucoma, hernia, carpal tunnel syndrome, recent surgery etc. Pregnant women should not practice beyond the first trimester due to the back bends.
